Click to jump
Methods to Update the Arduino Bootloader
There are mainly 3 methods for updating the Arduino bootloader. using an Arduino as an ISP programmer, using a dedicated programmer, and using Atmel Studio. The first method is more helpful and quicker than the others because you only need another Arduino board.
We primarily focus on the first method.
Using an Arduino as ISP Programmer
Step by step guide
You need one Arduino board as programer. In this example, I use an Arduino Uno board, 6 male to male jumper wires, and finally, another ATmega328 IC circuit or your new Arduino IC attached board.
1.Begin by preparing your Arduino board as a programmer(Use your existing working board).
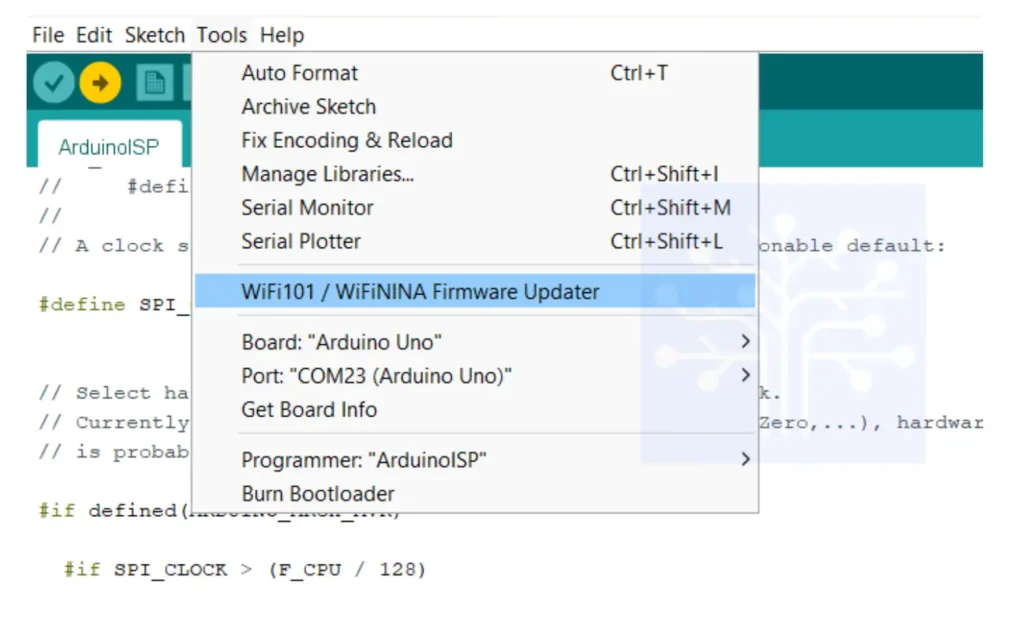
Open your Arduino IDE and then go to files/example/ArduinoISP

Then upload your code to the Arduino board.
Make sure your have to chose proppely your port and boads.
2.Connect the wire to your new arduino module or Atmega328 IC setup
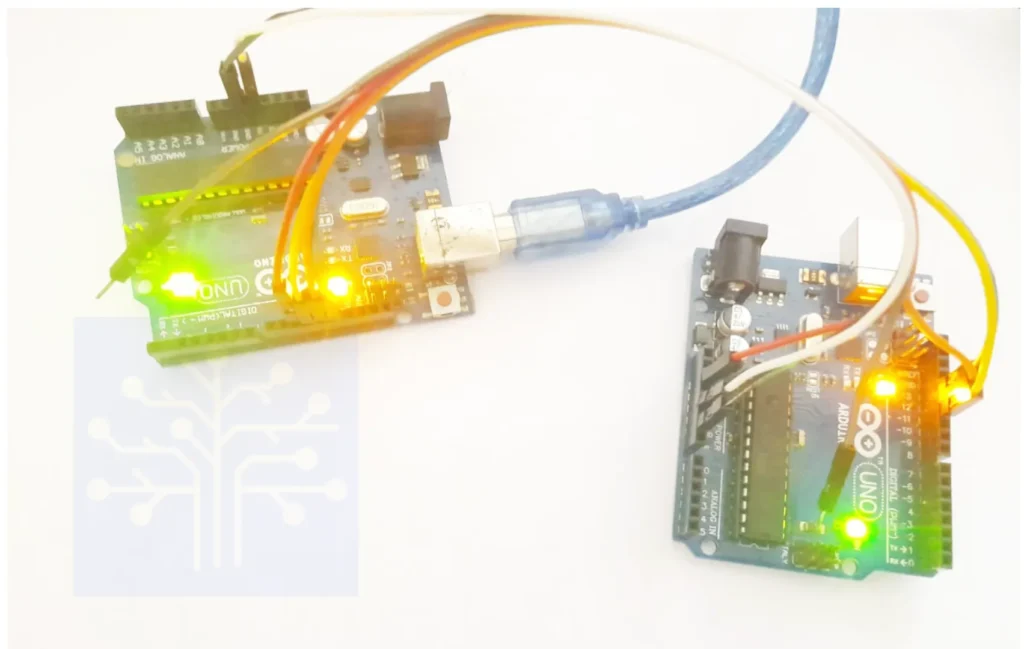
Attach your new IC to the Arduino Uno board during the programming stage, as it is more helpful than setting up a standalone, separate IC
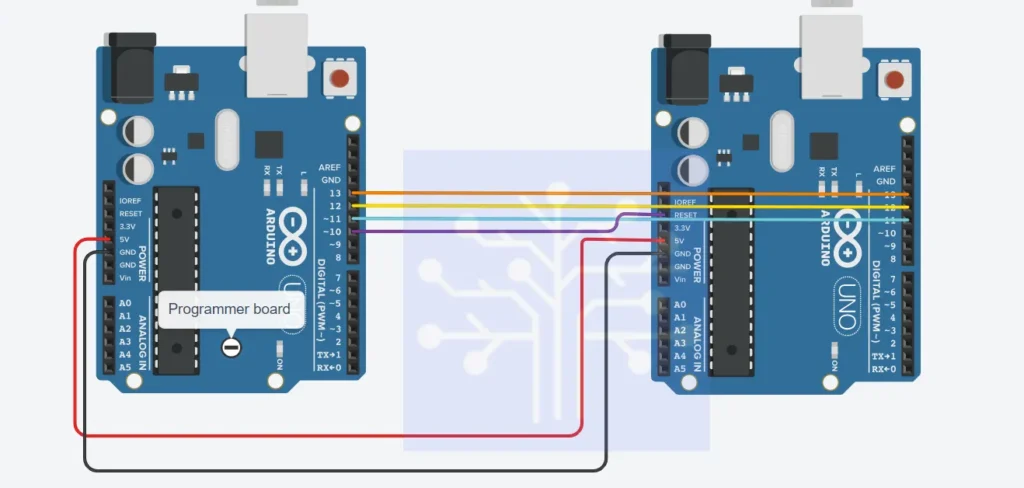
Connect pins 11, 12, and 13 of the first board to pins 11, 12, and 13 of the second board in parallel. Then, connect pin 10 to the reset pin of the new Arduino setup. Finally, connect the last two pins ,GND to GND and 5V to 5V.
3.Finally updating the bootloader
go to “tools/programmer/Arduino as ISP” and choose it.
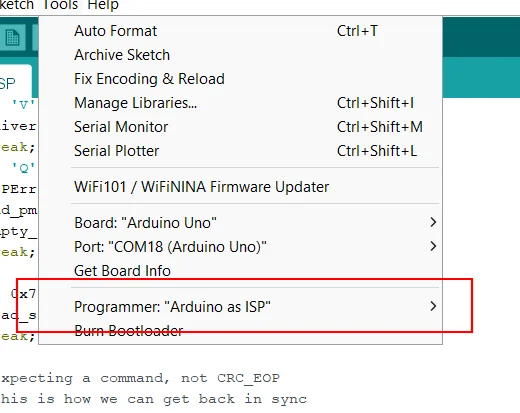
Finnaly burn bootloader
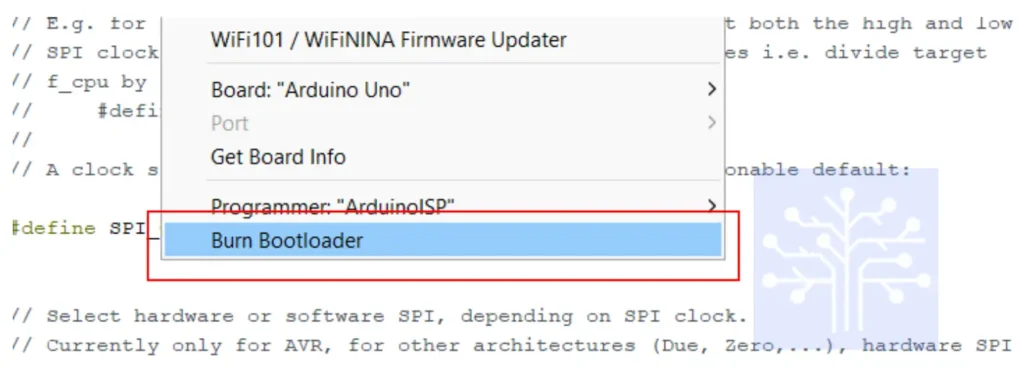
Now your new IC or arduino board is ready to normal programming.
Using a Dedicated Programmer (e.g., USBasp)
In here , this is same like previous one .
Requirements
Arduino Uno (the target board),USBasp programmer,Jumper wires,Arduino IDE installed on your computer
USBasp programmer
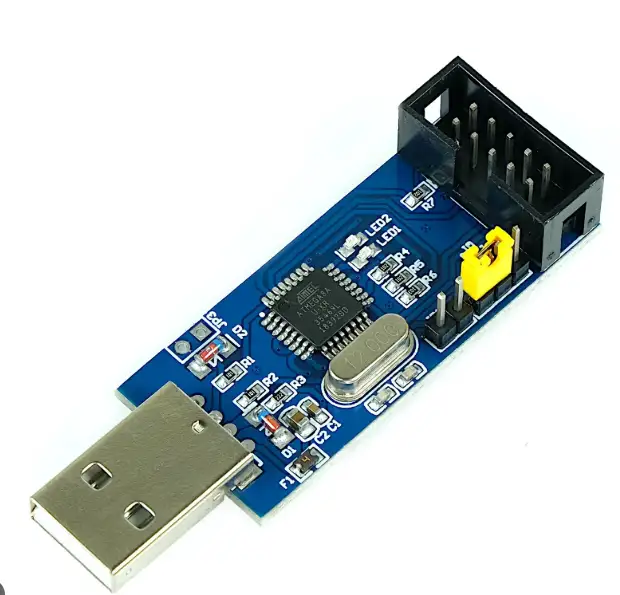
1. Connect the USBasp to the Arduino Uno
First, Locate the ICSP header on the Arduino Uno. The USBasp has a 10-pin connector that needs to be connected properly.
connect in this way.
- USBasp Pin 1 (MISO) to Arduino Pin 12
- (MISO)USBasp Pin 2 (VCC) to Arduino Pin 5V
- USBasp Pin 3 (SCK) to Arduino Pin 13 (SCK)
- USBasp Pin 4 (MOSI) to Arduino Pin 11 (MOSI)
- USBasp Pin 5 (RESET) to Arduino RESET pin
- USBasp Pin 6 (GND) to Arduino GND
2.Finnaly burn the bootloader
Go to “Tools/Programmer/USBasp” and send the code.

Finally, burn the bootloader.

Using Atmel Studio
This is the 3rd method of burn the bootloader.
1. Install Atmel Studio
Download and install Atmel Studio on your computer. The software is available on the Microchip website.
2. Prepare Your Bootloader
Ensure you have the HEX file for your specific microcontroller. This file is usually provided by the manufacturer or included in the relevant application notes. resources files
3. Connect the Programmer
Use an AVR programmer, such as Atmel-ICE or USBasp, and connect it to the ICSP (In-Circuit Serial Programming) header of your microcontroller. Ensure that the microcontroller board (Arduino board) is properly powered during this step.
4. Create a New Project
Open Atmel Studio on your computer. Navigate to File > New > Project, and choose the correct device for your microcontroller, such as ATmega328P for an Arduino Uno.
5. Configure Programmer Settings
Go to Tools > Device Programming. From the dropdown menu, select the programmer connected to your computer. Then, choose your microcontroller from the device list and click “Apply.”
6. Load Bootloader HEX File
Switch to the Program tab in the Device Programming window. Click “Browse” to locate and select your bootloader HEX file.
7. Program the Bootloader
Click the Program button to upload the arduino bootloader to your microcontroller. Monitor the progress in the output window, and wait for confirmation that the programming process is complete.
What is a Arduino Bootloader?
Overview of the Process
Arduino Bootloader is the first code that kicks in whenever the microcontroller powers up or resets. Think of it as similar to a PC’s BIOS. when power up the arduino boad ,it checks for any input to change settings, and if nothing is detected, it automatically runs the pre-installed operating system or application code.
Why Update the Bootloader?
Mainly 6 reson to updatebootloader.(Bug fixing,Support for New Hardware,Security Improvements,Compatibility with New Tools,Increased Memory Availability,Enhanced Features).
The first benefit is bug fixing – Newer versions of bootloaders can address bugs found in earlier versions, such as issues like endless reset loops
Support for New Hardware – For example, adding support for new sensors or hardware extensions.
Security Improvements -Devices can be vulnerable to hardware or software hacking. To prevent such situations, updating the bootloader is necessary.
Compatibility with New Tools – Updating ensures that devices become more compatible with software tools and programming libraries.
Increased Memory Availability – Some newer bootloaders free up additional flash memory for user programs. For example, switching from an old bootloader to a newer one can reclaim up to 1.5 kB of flash space, as seen in an Arduino example
Enhanced Features – Updates may introduce new features or improvements, such as better handling of firmware updates or additional configuration options.
Understanding the Arduino Uno Bootloader
When considering the Arduino bootloader, it is specifically designed for AVR microcontrollers. In the Arduino Uno boards, we focus on the ATmega328P microcontroller. The bootloader typically occupies 512 bytes (0.5 KB) of flash memory on the ATmega328P and leaving approximately 31.5 KB available for user applications.
It receives the hex file of your program from a PC. The Arduino bootloader uses a serial communication protocol over UART (Universal Asynchronous Receiver-Transmitter). It listens for incoming data on the UART pins to receive new program uploads. Most of the time the baud rate is 115200 bps for newer versions like Optiboot and which allows faster uploading of sketches compared to older versions that operated at lower speeds like 57600 bps.
When startup or reset the Arduino bootloader waits for a predefined period (typically around 2 seconds). The Arduino bootloader implements a variant of the STK500 protocol and it enabling it to communicate with programming tools like avrdude, which is used by the Arduino IDE to upload sketches.
The Arduino bootloader manages reset behavior of the MCU Status Register (MCUSR), determining if a reset was caused by an external signal or a watchdog timer reset and acts accordingly.
As a conclustion , Arduino bootloader is essential for enabling easy programming and firmware updates on Arduino boards like the Uno. its role in facilitating user-friendly development while maintaining efficient memory usage and robust communication protocols.

