click to jump
- Directly use it by connecting an external monitor and keyboard.(click)
- Connect to the Raspberry Pi board remotely over a wireless network.(click)
- Connect to the Raspberry Pi board remotely using a LAN cable to a PC.(click)
This blog article explains all the possible ways to connect to a Raspberry Pi board. In this case, I will cover three types of boards: Raspberry Pi 4, 3, and Zero W models, with practical way.
1.Directly use it by connecting an external monitor and keyboard.
First, we need to choose a Raspberry Pi board. If you are using a Raspberry Pi 4 board, then you need to find a Type-C power charger, and I highly recommend using the original Raspberry Pi charger. Then, you need a Micro HDMI (Type D) to HDMI (Type A) cable. It depends on your display. For example, if you are using a normal LCD or LED monitor, in most cases, HDMI inputs are used. If you only have a normal HDMI cable, you can use a normal HDMI to Micro HDMI adapter.
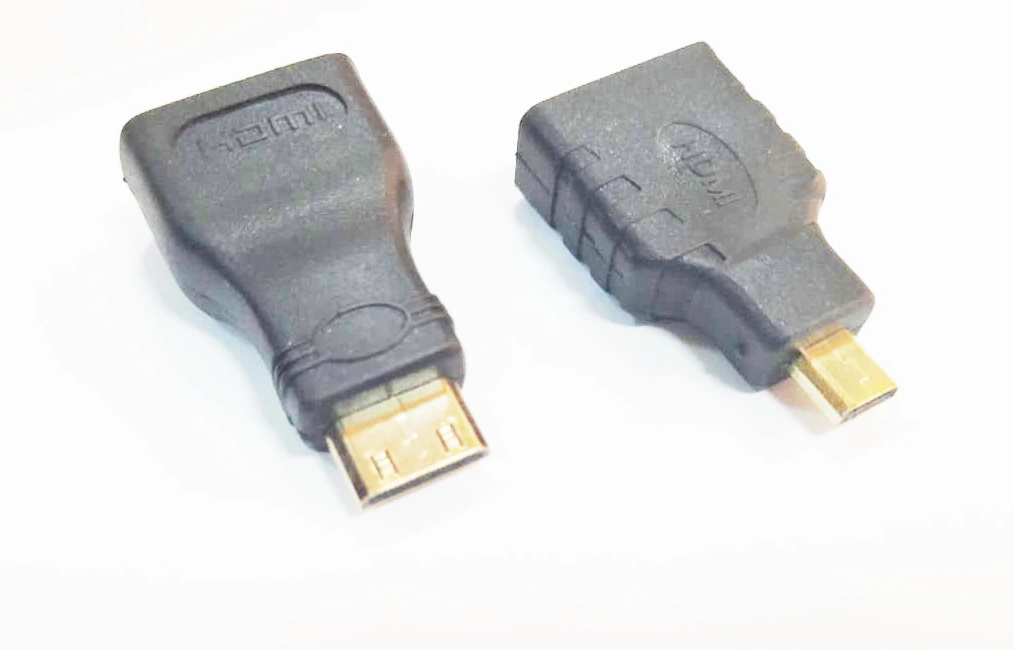
When you are using Raspberry Pi 3 boards, then you need to find a regular HDMI port cable (Type A to Type A). For power, you have to use a Micro USB cable.
When using a Raspberry Pi Zero W, you need to find a Mini HDMI (Type C) cable. For power, use a Micro USB cable.

Finally, at least you need to find a 16GB Micro SD card and a card reader.
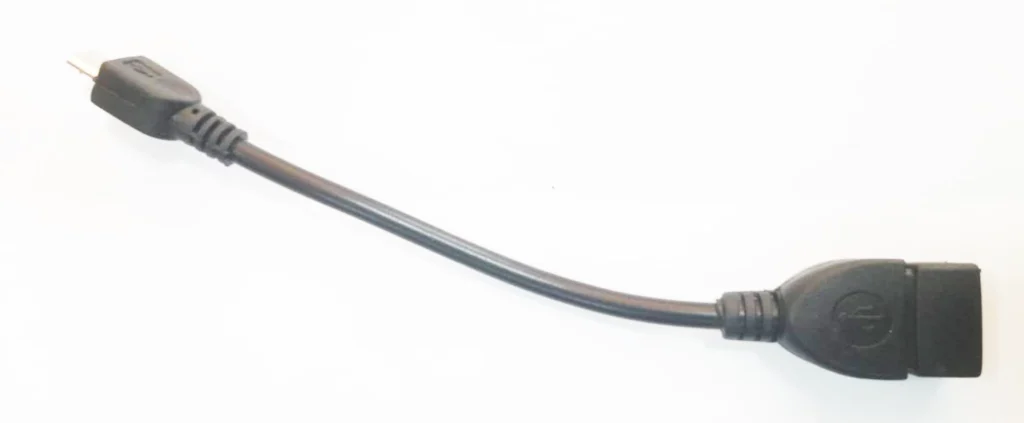
The main disadvantage of the regular Raspberry Pi Zero is that it doesn’t have any USB ports and only has a Micro USB port for USB connections. Therefore, it is better to have a Type-A USB extension cable or an adapter for the Micro USB port.Also, it is better to use a USB-type combo wireless mouse and keyboard with that. If you try to use a USB hub with Raspberry Pi Zero, most of the time it will not work because of high power usage. Most of the time, the board will restart without powering up the USB hub.
Raspbery pi 4

Raspbery pi 3

Raspbery pi zero/extended

Software you need to download before preparing Raspberry Pi boards.
| Methods | Softwares |
| Methods 1 | Raspberry pi imager , SD card formatter |
| Methods 2 | Raspberry pi imager , SD card formatter,VNC viewer, putty, Advanced ip scanner |
| Methods 3 | Raspberry pi imager , SD card formatter,VNC viewer, putty |
Raspberry pi imager software
Imager software is used to burn the Raspberry Pi OS onto an SD card, and the OS may vary depending on the type of board you use. It is recommended to burn 64-bit software for Raspberry Pi 4 and later boards. The Raspberry Pi 4 board features the BCM2711 SoC, which is based on the ARMv8-A architecture. It supports both 32-bit and 64-bit instruction sets.
For Raspberry Pi 3 boards, they are 32-bit and based on the ARM Cortex-A53 architecture. Finally, in the case of Raspberry Pi Zero and Zero 2 W boards, all of them are 32-bit at the hardware level.
According to this information you have to choose better operationg system for your board.
First of all, you have to open the Raspberry Pi Imager software. Then choose the device name and your preferred operating system, and connect your micro SD card to the PC.
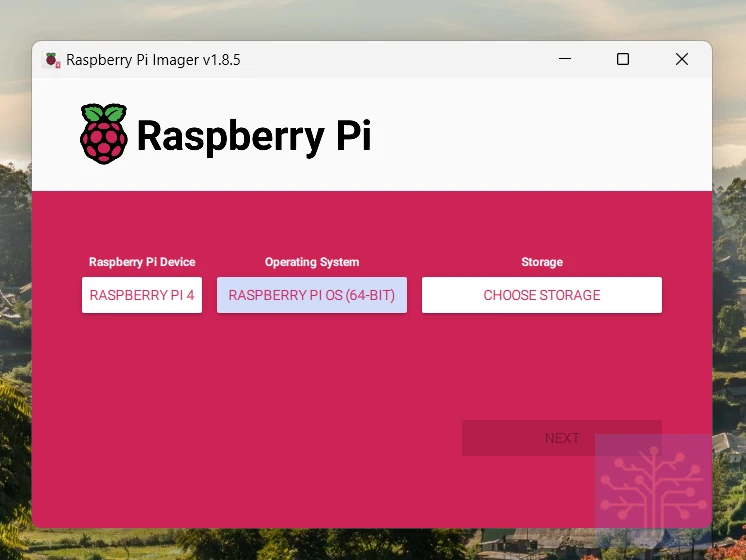
Then edit the following settings according to this:
You can change the Raspberry Pi name in the first section. By default, it shows “raspberrypi.local.”
Then if you want to change the username and password for the board, edit the next section. By default, it shows “pi” as the username and “raspberry” as the password.
Then you can assign the Wi-Fi connection settings. There is no default setting, and you can edit the Wi-Fi name and password. Here is the custom edit setting.

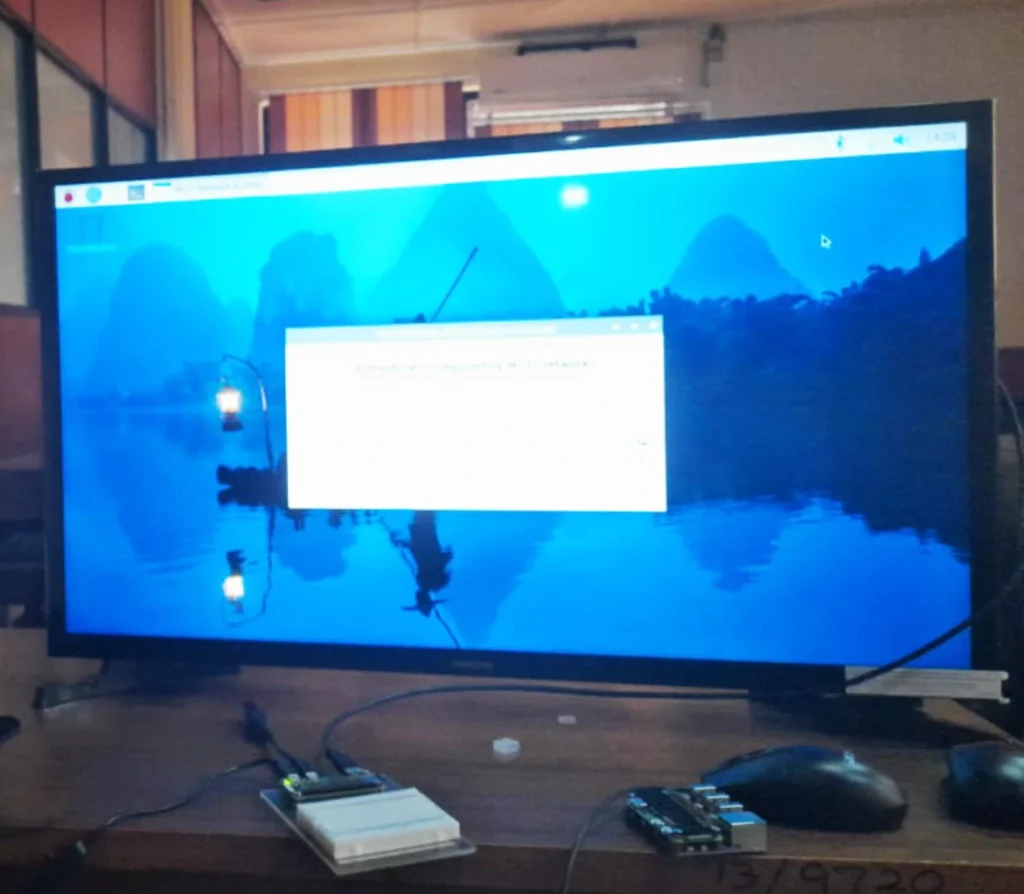
Or you can manually connect the Raspberry Pi board to Wi-Fi using the GUI of the Raspberry Pi [GUI]. (Change the country and region settings before connecting to Wi-Fi.)
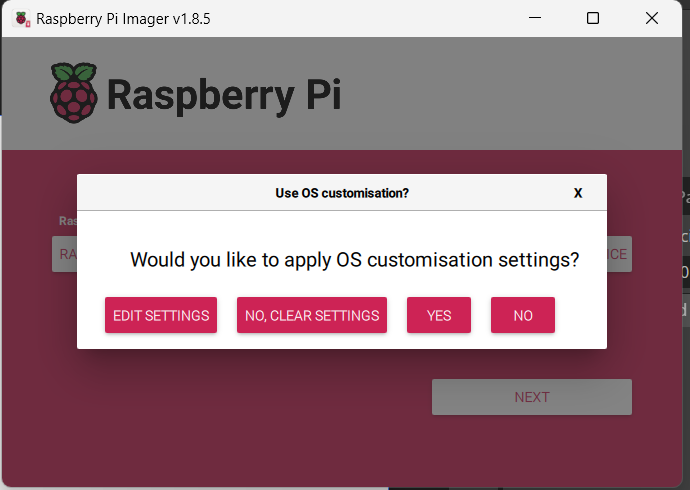
Then press “yes” and burn the OS into the SD card. Here is the general way to implement the OS into Raspberry Pi boards.

It will take some time to implement the OS into the SD card.
Then, you need to connect a desktop monitor, mouse, keyboard, and other peripherals to the Raspberry Pi board, allowing you to control everything through this setup.
2.Connect to the Raspberry Pi board remotely over a wireless network
I will explain this step by step. It is better to include the SSID and password of the wireless network when burning the OS onto the SD card.
In this case, you need to implement the OS in the common way as previously explained (refer to the Raspberry Pi Imager section).
In this case, you have 2 options. The first one is the easier option, where you only need to use an external monitor, mouse, and keyboard once. After that, you can use the Raspberry Pi board remotely. The second option is using the Putty method.
Setting Up the Raspberry Pi Remotely over a wireless network: Method 1
In the first method, you need to enable VNC on the Raspberry Pi and ensure it is connected to the same internet network your PC uses. Afterward, you can remove the monitor, keyboard, and mouse. Then, use Advanced IP Scanner on your PC to find the IP address of the Raspberry Pi. Open the VNC Viewer, enter the IP address, and log in to your Raspberry Pi board.
Setting Up the Raspberry Pi Remotely over a wireless network: Method 2
In the second method, you can connect to your Raspberry Pi board remotely using your PC.
Here, you need to add another file named “ssh” to the card. Note that there should be no file extension; otherwise, you won’t be able to open the Raspberry Pi board using Putty.

After that, you need to power up your Raspberry Pi board. Using Advanced IP Scanner, you can find the IP address of the board.Note that your Raspberry Pi and your PC must be connected to the same network.
Here is how the Advanced IP Scanner looks.

(If you are using multiple Raspberry Pi boards, it is better to attach a sticker with the MAC address to each device because the IP address may change over time. This helps in locating the exact device using Advanced IP Scanner if you know the MAC address of the device.)
After finding the IP address of the device using Advanced IP Scanner, open the PuTTY software, type or copy-paste the Host name or ip adress, and start up the device.
Putty
You only need to use PuTTY software once to activate VNC Server mode on the Raspberry Pi. Here are the full steps for enabling VNC Server mode:
After succesfully log into system you need to type this
sudo raspi-config
Then go to Interface Options -> VNC -> and click ‘Yes’ under the VNC Server Enable window.


After a little while, it will show that the VNC server has been successfully enabled.
Now you can close the Putty software and move on to the VNC Viewer software and open it.
VNC viewer
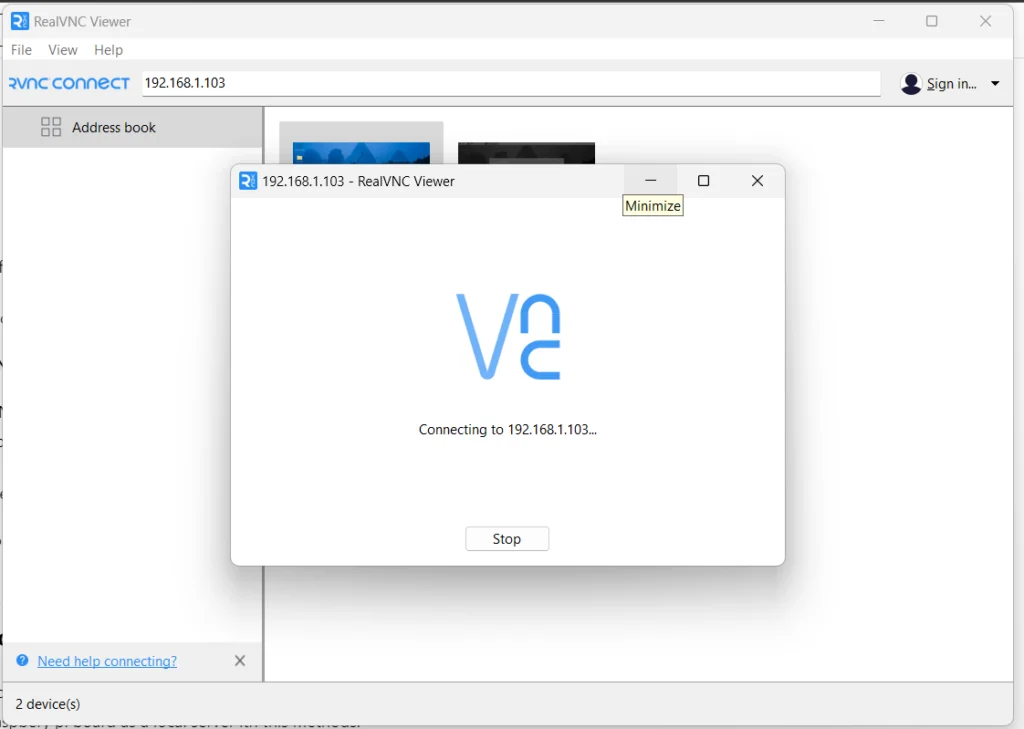
VNC (Virtual Network Computing) allows you to view the Raspberry Pi’s visual interface on your computer. To use VNC, open the VNC Viewer software on your PC, type your IP address, and press Enter.
Here are all the steps for using VNC Viewer software on a PC:
3.Connect to the Raspberry Pi board remotely using a LAN cable to a PC.
you need LAN(RJ45) cable to this way. in this way you dont need any axtenal router .you can use your raspbery pi board as a local server ith this methods.
in here there is slitly chnage in OS side.after buring to os in SD card remove it once na dreconnet in to pc .aftet that creat new fiile and and re name it as “ssh” without any extention insode the that SD card. and plug in to Raspberypi .
then power up the board and connect board using lan cable in to pc . then open putty software and type defult name “raspberrypi.local“.you can edit any name before buring the OS in to SD card in rapbery imager software.
Then enable the VNC server according to the previously explained steps.(jump to the VNC enable section)using putty software.After that, you can view your monitor using VNC software as previously explained (jump to the VNC viewer software section)
Finally, here are the three ways of using a Raspberry Pi board. The second method, which involves connecting the board wirelessly using a router, is the most recommended way because it is more stable than a LAN cable connection and requires fewer additional pieces of equipment compared to the first method. Additionally, if you don’t have Wi-Fi capabilities, for example, on a Raspberry Pi 3 board without B+, you can use a Wi-Fi dongle via USB. Most beginners, students, and professionals use these methods, especially for electronics projects, robotics projects, and IoT projects.
Useful info! Simple steps make a big difference when applied consistently. improve harvest I already see how it helps me avoid common mistakes.